
iixel Deployr Documentation
iixel Deployr is a desktop application for seamless sftp deployment.
Unlike your standard session based sftp application, iixel Deployr is project based. With your server and paths pre-configured, it really is effortless to deploy your builds to your remote servers.
Before getting started, lets go over the main features included in the application.
Project Prototype
In iixel Deployr, a project prototype is basically a configuration of how all of your projects will be set up for deployment. Projects, created under a prototype, will live in a main workspace folder on your local machine. Your project folder will contain deployment folders that are wired to remote paths specified in the prototype settings. Variables are used to generate paths that need variable directory names.
Projects
All projects are created inheriting it's prototype settings. To create a project, iixel will just ask you for the path variables required that are dictated by the prototype. The project will be generated containing the deployment folders.
Sometimes, a project will have to deviate from its prototypical settings. iixel Deployr allows you to fully change its deployment settings after it has been created.
Remote Servers
Prototypes
Projects
Pushing
Pulling
Remote Servers
Creating Remote Servers
iixel requires you to at least set up one remote server before giving you the ability to create your project prototypes.
To set up a server simply go to global settings, click on Create New Server, fill in and submit the new server form.
You can now create your project prototypes.*
*Make sure you have all of your remote servers set up needed for your prototypes. You can always go back into global settings to add new servers.
Edit Remote Servers
To edit a remote server, go to Global Settings, find the listed server and click the edit server button.
Delete Remote Servers
To delete a remote server, go to Global Settings, find the listed server and click on the delete server button.*
*iixel Deployr does not update your project using the remote server you are trying to delete. You will have to update those projects.
Prototypes
Creating a Prototype

To create a prototype, click on Create New Project Prototype button on the left panel.
Prototype Name

Your prototype buttons will appear on the left panel after you create them. In this field simply enter the name of you will like to give to your prototype.
Path Variables

If your paths are going to have variable directory names, create path variables by entering variable names. You can add more variables by clicking the "+ add variable" button.
Later on you will use these variables to construct your path strings for deployment.
Main Workspace Path

The main workspace path, is your local path where all of the projects will live under its prototype. iixel Deployr will use the project name to create the project folder and place it in your main workspace folder.
Simply paste your full path to where you would like to main workspace to be.
Deployment Wiring

The deployment wiring UI should contain the local deployment folder field (indicated by the folder icon) and the remote path field (indicated by the server icon).
Enter your deployment folder's name in the field along with all of the remote paths it will be deployed to. To set remote paths that require variable directory names, use the variables by wrapping them in curly braces ({}). (ex. "/path/to/{variable}")
For each remote server you're setting up, you will need to select which server you are going to connect to as well as select if this will be your main pull source
You can add multiple remote paths by clicking the "+add remote path" buttons.
Once you've set up your deployment wiring for the first deployment folder, if you need to make more deployment folder for this prototype, simply click on the "+add path set" button and repeat the process above.
Tip: avoid creating deep nested deployment folders. Any change in your build's architecture can cause you to have to make a lot of manual changes. It's best to have deployment folders be containers of your build rather than make part of your build.
Finish creating a prototype
Once you have all of your deployment folder setup, click on the create prototype button.
Edit a Prototype
To edit a prototype, go to global settings, find the listed prototype and click on the edit prototype button.
Delete a Prototype
To delete a prototype, go to global settings, find the listed prototype and click on the delete prototype button.*
*All projects under the prototype will be deleted along with the prototype itself. Local and Remote directories will not be deleted. If you need to delete the local/remote directories you will have to do so manually via an FTP client.
Projects
Create a Project
To create a new project, click on the prototype button on the left panel. The project list will slide to the right. Click on "+ Create New Project" button at the top. Because the project will inherit its prototype properties, all you need to do is enter the required variables and click the "Create Project" button.
Edit a Project
To edit a project, find the project under its prototype. Click on the project to open the project tab. In the project window, click on the "Edit this project" button.*
When editing a project, new variables can not be created. Changing local paths and remote paths do not rename the directories on your server nor on your local machine. Changing a remote path, essentially creates a new directory in your remote server when you push. You will have to manually clean up your server using an FTP client. Same applies to local paths. If you need to change a local path for this project, you will need to create the local path manually.
Set ignore files/folers
To set files/folders to ignore when pushing simpley go to Edit this project and insert all files/folders you want to ignore in the ignore files field*
if you want to set multiple files/folder, seperate them with a comma (,) no spaces.
Delete a Project
To edit a project, find the project under its prototype. Click on the project to open the project tab. Inside the project window, click on the "Delete this project" button.*
*Local and remote directories will not be deleted. If you need to delete the local/remote directories, you will have to do so manually via an ftp client.
Pushing
Note: If pushing a project for the first time to a remote server, please give iixel Deployr some time to do so. iixel has to first create all remote directories then perform the push mechanism of all paths in the project.
Push entire project
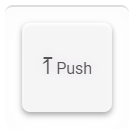
To push entire project to all remote paths, click on the main push button at the bottom right of the project window.
Partial push to select server
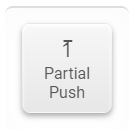
To partial push project to select server, click on the Partial Push button in the project window, and select the server you want to deploy to. This will deploy the entire project to all path assigned to the selected server.
Push to individual remote path

To push to individual remote path, click the the push button next the path you want to deploy to.
Pulling
Pull entire project
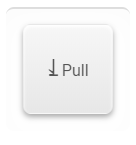
To pull an entire project from all main remote paths sources, click on the main pull button at the bottom right of the project window.
Pull from individual remote path
To pull from individual remote path, click the the pull button next the path you want to pull from.
If there is anything you need not stated in this documentation feel free to contact us at:
infoiixel@gmail.com